

How the queue works
1
A source queues an item
The source sends between 1 and 100 files in one call, with a label such as
Mailroom scanner that tells people where they came from. Each call becomes one item on the queue.2
The item waits
The files are stored encrypted. Items do not expire and are never cleaned up automatically: an item stays until its files are archived or someone removes it. Everyone who works the queue sees every item, not only their own.
3
Someone starts it
Start upload marks the item as handled by that person and loads its files into their upload list as ordinary rows.
4
The files are archived
Each file is indexed and uploaded like any other: document type, document date, keywords and AI suggestions work as usual. When the last file of an item is archived, the item leaves the queue.
Neither permission includes the other. Handling the queue does not give access to any document type: archiving a file from the queue needs the same document access rights as any other upload of that type.
Set up the queue
Before you begin
- Confirm that Upload is available in your environment. The queue is a tab of the Upload page.
- To grant the permissions you need Manage permissions. To create the source’s API client you need
iam.clients.manage. - Agree with the source’s owner on the label the source will send and on the document types its files will be archived as.
1
Create an API client for the source
Open Admin settings → Access → API clients and create one client per source. Creating it also creates a dedicated service user, and a dedicated user group that starts without rights. See API clients and service accounts.
2
Grant the source Prepare Pending Uploads
On the Permissions screen, grant Prepare Pending Uploads to the client’s dedicated group. The source needs no document access rights to queue files, because it never archives anything itself.
3
Grant the people working the queue Handle Pending Uploads
Grant Handle Pending Uploads to the user groups that index the delivered files. Check that those groups can create documents of the types the files will be archived as.
4
Connect the source
Give the source’s owner the client ID and secret and the contract below. The source signs in with client credentials, as described for integration contracts.
5
Verify with test items
Have the source queue two test items. As a member of a handling group, open Upload → Pending uploads: both items are listed under the source’s label. Start one, archive its files and choose Refresh: the item has left the queue. Remove the other.
What a source sends
A source queues an item withPOST /api/v3/pending-uploads, sent as a multipart form with these fields:
Send each file with its content type and a file name with the right extension. When the type is missing, the upload list goes by the extension.
Always send an
externalId when the source has one, so that a retry after a timeout cannot queue the same delivery twice. The protection lasts only while the item waits: once it has been archived or removed, the same ID queues the files again.
Use the interactive API reference for your environment for the full request and response shapes.
Work the queue
With Handle Pending Uploads, open Upload and choose the Pending uploads tab next to Upload. The number on the tab is how many items are waiting.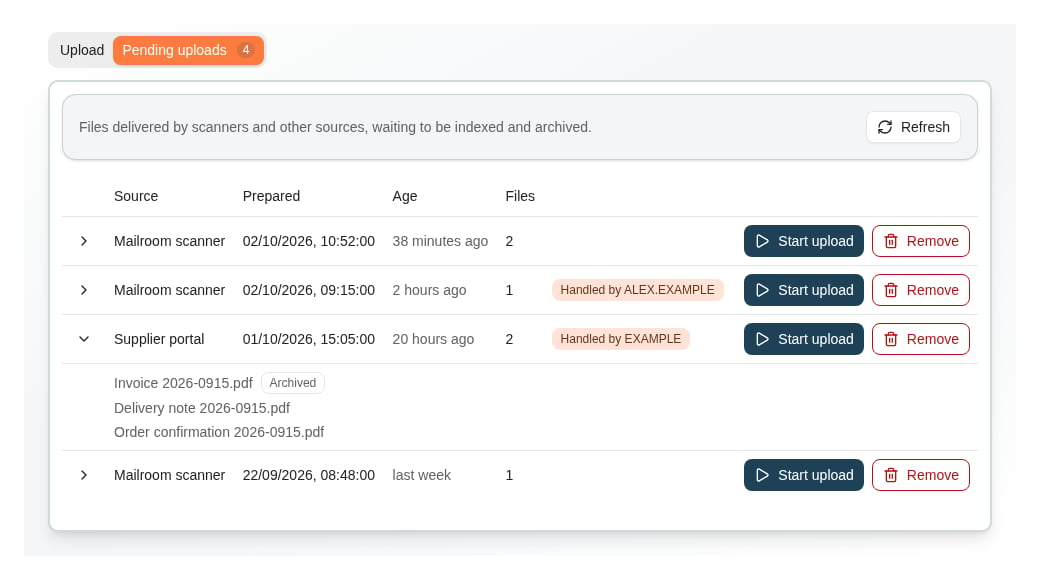
Four items waiting. A colleague is handling the second; the supplier delivery is expanded and one of its files is already archived. All names are fictional.
The list is loaded each time you open the tab, but it does not update while you watch it. Choose Refresh to see items queued since.
Start an item
Choose Start upload. The item is marked as handled by you, its files load into the upload list, and the tool switches to the Upload tab. The bar above the list says how many files came from pending uploads, with Back to queue to return.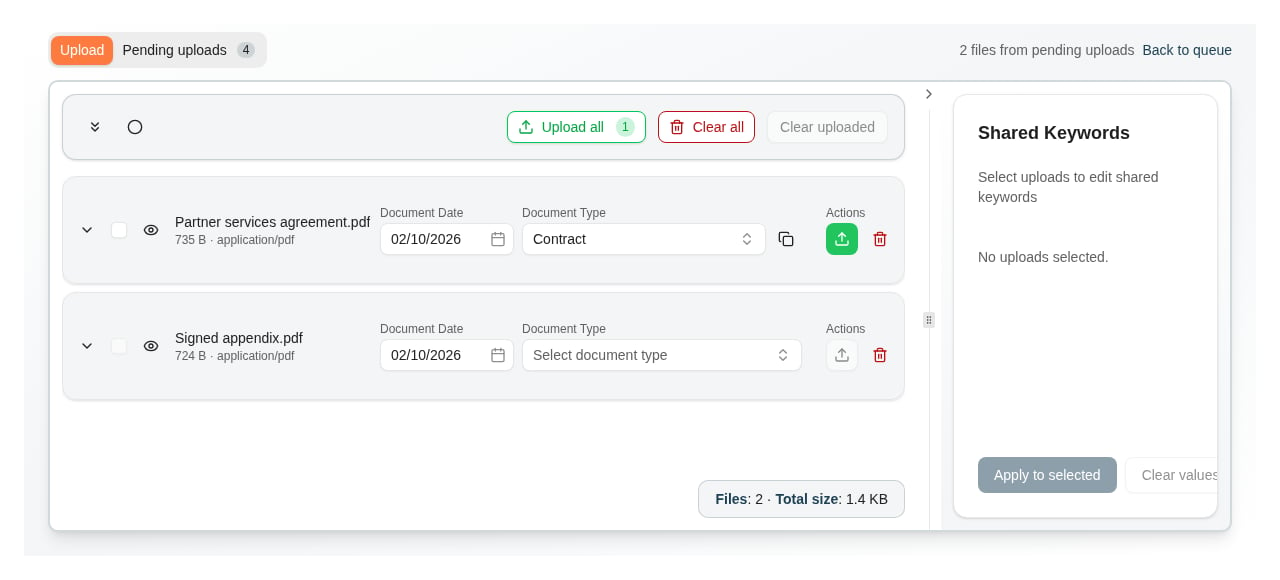
An item's two files loaded into the upload list. Index each one as usual; the item leaves the queue when both are archived.
Take over an item
Handled by tells your colleagues who is working on an item, but it does not lock it, and it never expires. When you start an item someone else is handling, you are asked whether to take it over.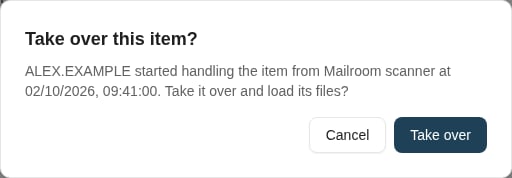
Starting an item a colleague started first asks before taking it over.
Remove an item
Remove an item that should not be archived, such as a blank page, a duplicate scan or something sent by mistake. Choose Remove and confirm.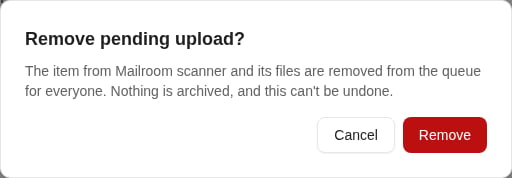
Removing asks first, because it cannot be undone.
What is kept and recorded
- Encryption. Files are stored encrypted while they wait and are deleted when their item leaves the queue.
- No expiry. Nothing leaves the queue on its own. Agree in your team who checks the Age column and removes what nobody will archive.
- Audit. Every item that leaves the queue is recorded in the configuration audit log as
PendingUpload:followed by the item’s ID, which the source received when it queued the item. The entry keeps the item as it was and how it left: for an archived item, the document each file became and who archived it when; for a removed item, who removed it and who was handling it at the time. Use your organization’s configuration-audit access or support process to look one up. - Documents. The queue shows whether each file has been archived, not which document it became. Find the documents through Search, or through the audit entry.
Where the queue appears
The Pending uploads tab appears only on the main Upload page. It is not shown in the Office add-in’s upload window, or where an upload is embedded in a Caseflow template.Troubleshooting
Where to read next
Configure a Microsoft 365 mailbox
Connect a mailbox, choose how mail and attachments are archived, and start postprocessing workflows.
How to upload and index documents
Choose document types, review keyword values and verify the archived result for the files you load from the queue.
API clients and service accounts
Create the source’s machine identity, grant its group access, and rotate its secret.
Application permissions
The permission catalogue, including the two pending uploads permissions.